Showing posts with label DIY. Show all posts

Monday, December 10, 2012

Schmoozie, it's not cardboard...

I have this student, we call him "Schmoozie"...
Sometimes Schmoozie reads my blog. Sometimes he's so nice and "schmoozes" on and on about how fabulous I am...
Other times, he makes fun of me for having cardboard on my wall. Those times, the times he makes fun of me, I make sure he knows that he's called Schmoozie for a reason. Teasing a girl about having cardboard on her wall does not a Schmoozie make!

So, in an effort to bring back the Schmooze I thought I'd clarify a few things...

1. The picture below does not include any pieces of cardboard. It does however include carefully placed pieces of brown paper, each labeled with a location that Freddo and I have visited (i.e. "Paris", "Mykonos", etc.)


2. The reason for said "cardboard" is to make sure that the frames below were hung correctly to perfectly display our most up to date adventures.


3. Now Schmoozie, don't you think the cardboard was worth it?


Tots was,
Han

**Update** I don't think the etsy shop we bought our print from is open anymore, but below are some links to shops that sell ADORABLE prints with the same phrase... love!
TheCuriousNickelChloeVauxMyPlaceInTheWorld

Tuesday, March 20, 2012

Thank Heaven For Little Girls....


My sweet friend Kate is expecting a precious baby girl {coming soon this summer}!

This weekend a few of us threw her a baby shower...

We had so much fun!
I volunteered to plan the craft for everyone to do...
{Yikes!}
Thanks to pinterest, I found this incredible easy tutorial for all the ladies to do.

Obviously, I had to try it out myself before I made everyone else do it! ;)


 Of course... I just had to add some ruffles... 
Ugh. I die.

 At the shower we set up a little table with all of our supplies...


The girls and I had so much fun chatting and decorating our onesies.


I must say... each onesie turned out adorable!


To add a little something personal, each girl wrote Kate a note and clipped it to their finished onesie!


I just love how they all turned out! What do you think?

Smooches-
Hansie

Wednesday, February 22, 2012

A Collection of "To Dos".


I've got this running list on pinterest of DIY projects that I'm dying to try.

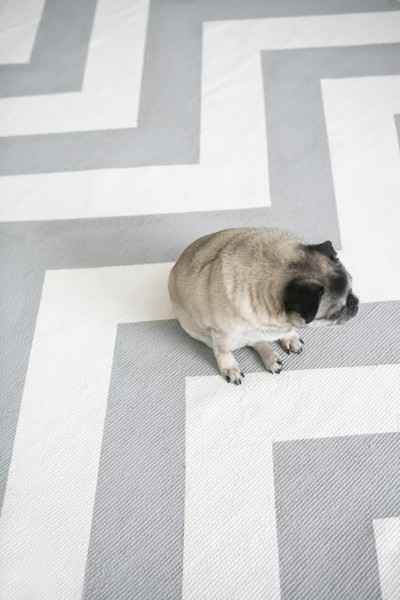
--But-- This chevron rug has been begging me to have a go at it for months.

Spring break. It's going down. 

Thinking of rocking out a little mustard on white action instead of gray. Thoughts?

source


Oh for an endless summer with nothing to do! 
My little apartment and wardrobe would look so cute!

Any pinterest projects on your horizon? 
Do spill!

Hansah-ah-ah

PS. If you're not already... follow Racha and I on pinterest (click the button on the left)! We love new friends! ;)

Thursday, November 3, 2011

Fall Favorites Series: Lumbar Pillow DIY from Elm Street Life

Today for your "fall favorites" pleasure-
We have Whitney with a supra comfy DIY for you! 
Be prepared to be impressed and fall in love with her ridiculous talent! We're inspired and encouraged every stinkin' time we read this chika's blog and we know you will be too...

--------------------------------------------------------------------------------------------------------------

Hi everyone! My name is Whitney and I blog at Elm Street Life. I am so excited to be posting on Etta Grace today, and I hope you love this really simple DIY project as much as I loved creating it! This project is so perfect for these cozy fall and winter months, or it would make a sweet gift.

Let's get started...


I found this sweater at Goodwill and I have a feeling if you hopped into about any thrift store or Salvation Army, you could find one too. And in this case, the bigger the better!


And that's it! I told you it was easy!! The lumbar pillow I used measures approximately 15" x 25" so it's pretty large, but you could definitely use a smaller pillow too. You'd just need to cut down the sides for it to fit a little more snug.

I hope you have fun making your home just a little more warm and cozy like I did. Thanks so much for having me!

--------------------------------------------------------------------------------------------------------------
Wowza! Think of the possibilities!
Thanks Whit-
Racha and Hansie

Friday, October 7, 2011

Eggplant Sparkle Boots: Racha's 5 for 5

Fall....it's like Meg Ryan said (before her wierd lip situation), "bouquets of sharpened pencils."
Ever since the chill hit I have been itching to take a big old
bubble bath of DIY.
This week especially has brought some great ones to light.
Chex it out:
Transparent cuff...um, I'll take forty

Eggplant City is where I want to be

gilded nature...it feels so good.
The cuffs are at the top of my list. I'll let you know if it turns out awesome, 
or super awesome.

Luff-
Racha

Wednesday, August 17, 2011

Clothes Stealers: Re-Do... Plus a tutorial....


There is something you should know about me (Hannah) if we're really going to be friends.

And that is that I want so badly to be "granola"...

Maybe it's because I grew up just a few minutes away from Berkley, CA... or maybe it's because I have a deep appreciation for anyone that can pull off dreadlocks with a baggy tie-dyed shirt... or maybe it's just because people who are "granola" have their "artsy with the perfect amount of fartsy"...
I don't know...
Either way... I want to be "granola"...
There. Now we can officially be friends...

All that to say... a while ago my little old granola heart was oh-so-inspired by none other than the beautiful, Bex with this post....

And then, I just so happened to stumble upon this tutorial via pinterest...

And then... Rachey Pooh was all "Oh I have a great idea!! Let's wear tie-dye for Clothes Stealer's!!"
which neither of us did... but that's neither here nor there... right? right.


So... Get ready! All of that inspiration was put to good use!

Here's your very own "Do-It-Yourself" Fake Tie Dye Tutorial.
Ps. It's called "fake" because we're not actually dying anything... we're being magical and "un-dying" it...
I know... fancy. epic. ridiculous.

Step 1: Take an item of clothing that is any color other than white. I took a black maxi dress that I just made this week, but was feeling like it was a little boring...

Step 2: Collect a ton of rubber bands, bleach and a disposable bucket.


Step 3: Combine about 1 cup of bleach with 2 1/2 cups of water.

Step 4: Take your item of clothing and twist, scrunch and knot... then hold secure with your pile of rubber bands.


Step 5: Dunk your item of clothing (or in my case only part of my skirt) into your bleach/water mix. Make sure that the part of the clothing you'd like "un-dyed" is fully immersed in liquid. Set timer for 25 minutes if the item is black. (If item is a lighter color set time for a shorter amount). Either way, check on item periodically (i.e. every 5-10 minutes).


Step 6: Remove clothing item from bleach/water mixture. Then unband and rinse your item.
(Make sure to rinse well so that the bleach doesn't run on any other part of the clothing)


Step 7: Wash and dry your clothing as you normally would. And then.... flaunt it!


So?? What do you think? Granola enough???

Like the maxi dress? We're thinking about putting some up in the shop...

Also- aren't you just so impressed?? A tutorial and Clothes Stealers all in one... it's getting crazy around here... Grab a button on the left and link up lovelies... show us what you're wearing this week!

xoxo- Hansie


PS. Today we're also linking up with Lindsey from The Pleated Poppy to flaunt our outfit.

Wednesday, June 8, 2011

I ain't no rapper... but I'm tryin' to wrap fo sho.

Dear dearly...

So... the other day, I kind of sort of made a wrap...

I had this fantastic idea in my head about how it would turn out....

It wasn't quite what I was hoping or expected it to be...

but for a first attempt... without a pattern... I like it...

Attempt 2 and 3 will be much better. Promise.

What do you think? 

If you don't like this wrap... how about this rap?

You die. riiiight??? Her facial expressions. death. of. me.
thanks cristen!

Luffy you- Hans

Wednesday, May 25, 2011

Yum-diddly-um! Recipe Remix from Cate

I have this friend named Cate.
There are a few things you should know about her...

1. She's ridiculously good looking.
2. She has the ability to show grace, loyalty and compassion like very few people I've ever met.
3. She's one of the best people to travel through Europe with.
4. She knows a thing or two about cooking.

Cate and I used to live in Switzerland... we were those kind of friends who could sit and talk for hours and puke their hearts out to each other... you know... the friends who's conversations you walk away from feeling like the world's problems were just solved...
Cate helped fix the world... or at least how I saw it... she helped me mend my heart when I needed it and puff out my chest when it became deflated...
And the whole while... she fed me the best Zucchini Pesto Pasta a girl could ever dream of!

Last night I made a tweaked out version of Cate's pasta... The Hubs loved it... and with each bite I felt like all of life's problems were getting solved... since this pasta is so powerful... I thought I'd share the recipe with you! You can send a big "thank you"... to Cate!

Cate-y Cate's "solve the world's problems" Pesto Pasta
(serves 3ish)

Ingredients:
-4 green onions
-1 Tablespoon minced garlic
-1 Tablespoon olive oil
-1.5 cups sliced mushrooms
-1 thinly sliced zucchini
-1 teaspoon of black pepper
-a pinch of salt
-a pinch of red chili peppers
-2 Tablespoons of pesto
-3 cups uncooked pasta (I love it with penne or bowtie)
Directions:
1. Boil water and cook pasta to your liking.
2. While pasta is cooking; combine all other ingredients in a pan and saute until zucchini is soft. (I prefer to cook the veggies a bit longer to brown them a bit.)
3. Combine pasta with pesto and scoop into bowl. 
4. Place veggie mix atop the pesto pasta... and Voila! 

Enjoy... and let all your life's problems be solved!

Luf- Hansy Bear.

Wednesday, February 9, 2011

Ahem...


So the other night turned into girls night and we decided that I needed a cut and color. Laura (sis-in-law) is an artsy-fartsy genius and that extends into the hair field. I think she did a fabulous job, and it cost only 10$ and a mason jar full of peachio's!
Before (Purple lipstick!)
During...so Luxurious to have a personal hair stylist
Yay! (Style by Jamie)
Then, I obviously had to model my new hairs, which was quite an ordeal because posing is surprisingly difficult and a skill I lack. Laura was a great director, I was a terrible model, Jamie gave half-hearted 'you-go-girl's' while looking at JCrew and wishing she had trazillions of dollars...


The Half Smile
The Hair Tousled Look of Seduction
The Cute Wink
The "Laughing-at-how-ridiculous-these-look"

Such fun on a Friday night!
P.S. We're doing Jamie next week...

Tuesday, February 8, 2011

Heidi Hair (or Milk Maid Braids)


I always get questioned on how to do this look so I thought I'd throw a quick tutorial up here(Please excuse my stage presence). It's super fast and a nice alternative to the normal braid and/or pony that has been dominating your life up to this point...

Time: 4 minutes
Price: 7$ for the EttaGrace bobbies
Cutecutecute!


Tuesday, February 1, 2011

Knock-off Nymph Net

As always Anthropologie made a beautiful necklace that I couldn't afford. Fortunately for me, Martha Stewart made the exact same one and posted a tutorial!

Time: 50 minutes
Cost: 10$
Results: Pretty good if I do say so myself!


Tuesday, January 25, 2011

Nautical Knot Belt

While riding the wave of the interweb recently, I came across this beautiful necklace and knew I had to make a belt  inspired by it! I've always loved a nautical motif and for the price and time this belt took, I grew only to love it more...

Total Cost: $9
Total Time: 54 minutes (what a perfect mid-morning break from the ol' calculator and chemistry!)


Friday, January 21, 2011

Three Cheers, two jeers: A list of 5's


1. it's almost the weekend... life is as it should be.
2. i made a skirt this week... without a pattern... wore it to work... i. am. brave.
Tutorial Here!


3. favorite sbux beverage at the moment... double cupped quad tall two pump peppermint americano... 
puuuuuuuuuur-fection.

 4. just grossed myself out with the previous cat reference. ugh.

right!?!?!?!?! loooooooongest bangs ever!


5. need to get my bangs trimmed and am practicing 
every kind of self control 
to not cut 
them myself...